Kids and Summer – and Peanut Butter Bars

Easy Peanut Butter Bars

About a month ago, I was so concerned with what I was going to do since summer was coming.  See, my older little boy is in preschool and it was letting out for 2 months.  It is hard to take two preschoolers with me anywhere, and I had grown accustomed to getting things done in the morning with just one of them.

And here, almost July, and we have one more month. A month filled with fruit picking, zoo trips, play dates, and vacation to North Carolina.  It hasn’t been as tough as I thought, but my husband has been gracious with his time off, too.

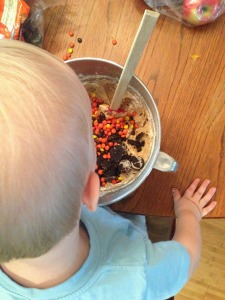
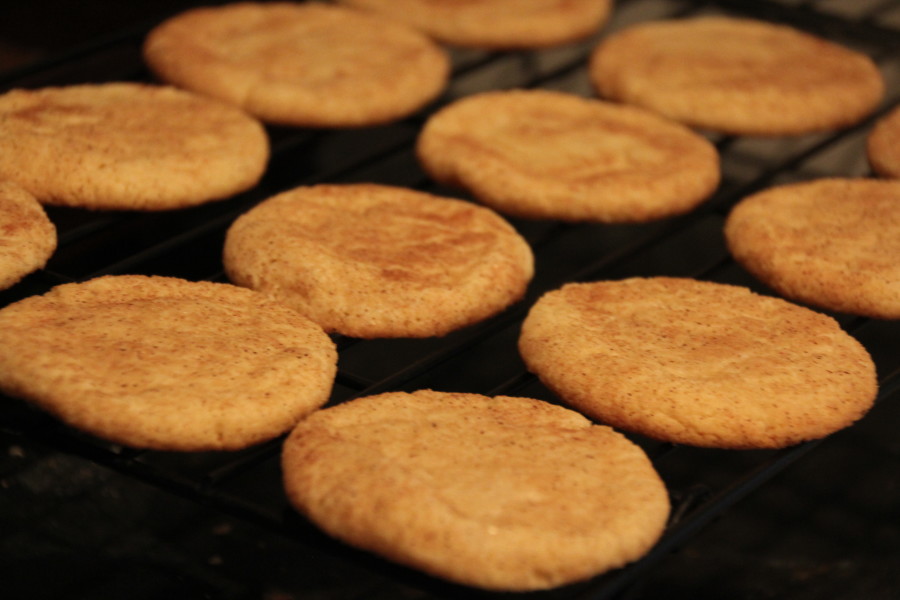
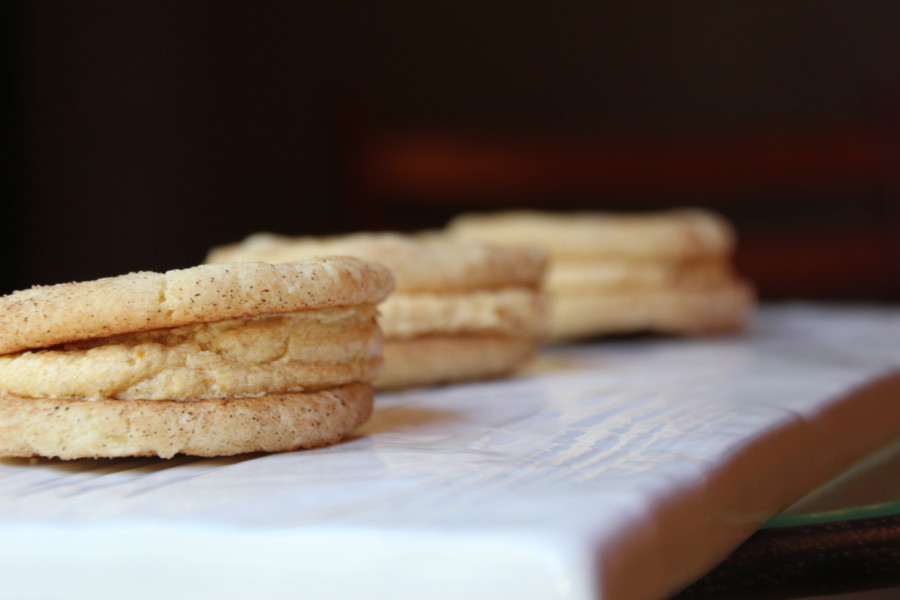
At the beginning of the week I wanted to bake something and get my older preschooler in the kitchen.  He really loves being in the kitchen with me and I love it.  So, we opened a cookbook, made a few tweaks with what we had, and put them in the oven.

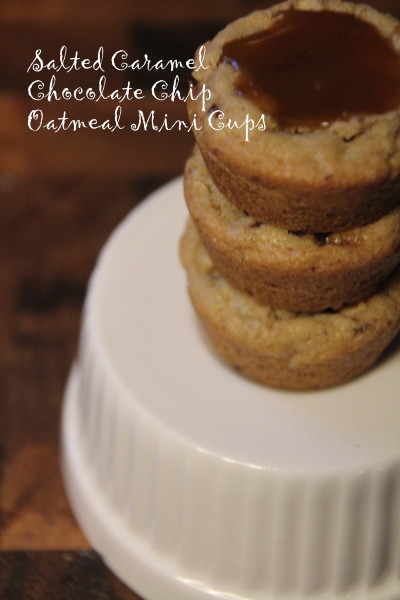
The next day we got to head to Roswell and go hiking and playing in the water at Vickery Creek Falls.  So fun.  My boys are definitely water lovers and they love any time they get to spend with their daddy.  These bars were delicious and portable and had some good energy boosting carbs in them to refuel them after the hike.

Easy Peanut Butter Bars
Author: 
Recipe type: Bar
Cuisine: Dessert
Prep time: 
Cook time: 
Total time: 
Serves: 20
 
Easy, portable, not-to-sweet peanut butter bar
Ingredients
  • ½ cup unsalted butter, softened
  • ½ cup sugar
  • ½ cup packed brown sugar
  • 1 egg (room temp)
  • 1 tsp vanilla
  • 1 cup all-purpose flour
  • ¼ tsp kosher salt
  • ½ cup rolled oats
  • ½ cup roasted peanuts (halved)
  • ¾ cup chocolate chunks (I used dark)
  • ½ cup 10x sugar
  • 1½ T creamy peanut butter
  • 2 T milk (or until desired glaze consistency)
Instructions
  1. Cream first ingredients (through vanilla).
  2. While you let the mixer do its work, get a 9x13 pan, line with foil, spray with cooking spray, and set oven to 350.
  3. Combine dry ingredients and mix with sugar mixture.
  4. Fold in chips and nuts.
  5. Press into pan and bake for 20-25 minutes.
  6. When done, let cool in pan for 5-10 minutes.
  7. Take the bars out (made easier with the help of the foil) and put on cooling rack.
  8. Mix glaze and drizzle over the bars.
  9. Let cool completely then cut into squares.
These were easy to assemble and tasted great and have lasted well throughout the week.

Lemon Cardamom Shortbread Cookies

Lemon Cardamom Shortbread

Cardamom is definitely my favorite go-to spice with anything berries or citrus.  It just lends that special “oomph” and “hmmm, wonder what is in there” to any recipe.  I have made some cardamom sugar with the pods and always have ground cardamom in my spice “basket” (a wine box I found at Goodwill which I love and am always in search of another one for cheap).

Anyway, I had to share this recipe tonight!  Just in case you have tons of lemons and you just have to have cookies with your decaf tonight!

This recipe is a shout out to Cheryl Day who owns Back in the Day Bakery – my fave cafe in my favorite city in Georgia, Savannah.  I tweaked her recipe and oh by golly is it good (and her’s is stellar too by the way).

Lemon Cardamom Shortbread Cookies
Author: 
Recipe type: Cookies
Cuisine: Dessert
Prep time: 
Cook time: 
Total time: 
Serves: 3 dozen
 
Perfect chewy shortbread for that cup of coffee!
Ingredients
  • 2 sticks unsalted butter, softened
  • 1½ tsp lemon extract (I love opening the bottle of this, smells amazing)
  • ¼ tsp sea salt
  • 1¼ cup 10x sugar
  • 2 cups all-purpose flour
  • zest of two lemons
  • ⅛-1/4 cup cardamom sugar (for sprinkling on top before baking)
Instructions
  1. Heat oven to 350.
  2. Spray sheet pans with baking spray.
  3. Cream butter. Add in salt and lemon. Combine sugar and zest. Then add in all purpose flour. Shape into balls with your hands and gently press them down (I'd love to find a pretty cookie press for this one, a simple, antique one would be great).
  4. Let chill in fridge for 2 hours.
  5. Sprinkle cardamom sugar on top of each cookie.
  6. Bake at 350 for about 10 minutes.
  7. Cool a little - then devour them warm, or wait until morning.


Soft and Chunky Oreo Peanut Butter Cookies


Soft and Chunky Oreo Peanut Butter Cookies

Here are two disclaimers for this recipe post about a delicious cookie:

1.  I am a purist when it comes to Oreo Cookies.  None of these fancy seasonal flavors or even the double stuff or reduced-fat. No, give me the original!

2.  I wouldn’t say that peanut butter cookies are my favorite.  There are plenty in front of it.

So, when I passed by the Peanut Butter Oreos in the Wal-Mart aisle today, it could only be my creative streak and giving into my son when he said “cookie” that made me want to whip up a batch of these.

Elijah's first baking

But how would Oreos and Reece’s Pieces (E. T. Phone Home – my husband’s favorite childhood flick) go together.  I guess there was only one way to find out!

Reece's Pieces

Bake!

These cookies were like pillow-soft.  I loved that about them.  Perfect texture.  I loved the chewiness with the texture from the Oreo pieces and candy coating from the Reece’s.  My husband said he wouldn’t change a thing. I’m glad. I adore these cookies.

And the colors work perfectly for the Fall.

Soft and Chunky Oreo Peanut Butter Cookies
Author: 
Recipe type: cookies
Cuisine: dessert
Prep time: 
Cook time: 
Total time: 
Serves: 18-24
 
Soft, chewy, chunky, peanut butter cookies - easy to munch on all night!
Ingredients
  • 1½ sticks unsalted butter, softened
  • ½ cup dark brown sugar
  • ½ cup regular sugar
  • ½ cup creamy peanut butter
  • 1 egg
  • 1 tsp vanilla
  • 1¼ cup all-purpose flour
  • ½ tsp baking soda
  • ½ tsp kosher salt
  • ½ tsp cinnamon
  • 1 cup crushed Oreos (but not too fine)
  • 1 cup mini Reece's Pieces
Instructions
  1. Cream butter and sugars for about 5 minutes until light and fluffy.
  2. Add peanut butter, egg, and vanilla - mix for another 5.
  3. Add in dry ingredients
  4. Fold in Oreos and Reece's.
  5. Spray 3 cookies sheets with cooking spray.
  6. Preheat oven to 350
  7. Spoon out onto sheet pans and bake for 10-12 minutes or until set - but don't overcook.
  8. Let cool.
  9. Devour
 

Spiced Apple Cake with Cream Cheese Frosting

Apple Spice Cake with Cream Cheese Frosting

Fall equals apples to me.  And I had a reason to make a cake today: because I had a bag full of apples.  And I had a spice cake mix so all I had to do was run to my neighborhood Publix and get some cream cheese.  Because we all need some good creamy rich cream cheese frosting every now and then right?

Fall Baking

This is simple and moist and definitely a winner.  Enjoy tonight!

Spiced Apple Cake with Cream Cheese Frosting
Author: 
Recipe type: Cake
Cuisine: Dessert
Prep time: 
Cook time: 
Total time: 
Serves: 12
 
Moist, perfect fall cake with a thick layer of cream cheese frosting
Ingredients
  • 1 boxed spice cake mix
  • 3 eggs
  • 1 cup water
  • ⅓ cup vegetable oil
  • 3 cups chopped, peeled gala apples
  • 1 8oz package of cream cheese
  • 2 cups powdered sugar
  • 1½ tsp vanilla extract
  • 4½ T unsalted butter
Instructions
  1. Mix cake according to box instructions.
  2. Add in apples before baking.
  3. Spray pan and cook according to box instructions.
  4. Let cool.
  5. Mix cream cheese and butter.
  6. Add in vanilla
  7. Add powdered sugar until frosting is smooth.
  8. Frost cake.
  9. Eat.
  10. I cut circles out of the cake and just set a double layer and made naked cakes with just layers of cream cheese frosting. Sprinkled some cinnamon on top.


Snickerdoodles with Spiced Pumpkin Buttercream

Snickerdoodles with Spiced Pumpkin Buttercream

Bring on the Fall!  The weather hasn’t changed that much from last week, but the feel in my kitchen certainly has.  Earlier this week I made some of these: some friends and some little misters in our home devoured these.

They are all gone.

Snickerdoodles

I had never made a snickerdoodle until I lived with one of the girls I discipled (while she was in college).  She loved snickerdoodles.  And the fun thing is – that as I read the directions, I read them wrong, and it turned out I like it better and now this recipe is my tried and true snickerdoodle.  Snickerdoodles are so easy and if done right they are perfectly soft and chewy for days.  We just had the last of these at lunch and they were still chewy. Success!

Fall Snickerdoodle Lineup

And seriously – one of the things that can make any bad day better for me is buttercream.  I love it – a true Hero! 🙂 But, it is also a bear to get perfect.  If you get your butter too soft – forget it.  I think I added too much pumpkin to mine trying to achieve the perfect pumpkin flavor – but below I’ve changed the recipe some.  I hope yours turns out better than mine.

These were a perfect way to start off Fall baking season!  And my favorite buttercream frosting is this one

Snickerdoodles with Spiced Pumpkin Buttercream
Author: 
Recipe type: Cookies
Cuisine: Dessert
Prep time: 
Cook time: 
Total time: 
Serves: 12
 
Soft chewy snickerdoodles sandwiched with a soft and spiced pumpkin buttercream
Ingredients
  • 1 stick unsalted butter, softened
  • 1 cup plus 2 T sugar
  • 1 tsp vanilla
  • 1 egg
  • 1½ cup all-purpose flour
  • ¼ tsp baking soda
  • 1 /4 tsp cream of tartar
  • 2 T sugar
  • 1 tsp cinnamon
  • My favorite buttercream recipe (for this recipe, don't use as much vanilla) - see link above
  • 1 T pumpkin puree
  • ½ tsp cinnamon, allspice, and pumpkin pie spice
Instructions
  1. Preheat oven to 375
  2. Cream butter and sugar, egg, then add vanilla.
  3. Add dry ingredients.
  4. Roll in one inch balls and then roll in sugar and cinnamon mixture.
  5. Let bake - mine took 11 minutes to come out perfect. 10-12 depending on your oven.
  6. Let cool.
  7. Follow directions on buttercream, adding in the pumpkin and spices to your taste!
  8. Sandwich and eat!


Eat This: Salted Caramel Chocolate Chip Oatmeal Mini Cups

posted in: food | 0

Salted Caramel Chocolate Chip Oatmeal Mini Cups

Every time I open my fridge, I see this bowl of Brown Eyed Baker’s salted caramel sauce staring me in the face.  Its like its begging me to make something with it, or just dig in with a spoon.  That’s what spoons are good for, right?  Eating caramel!

While I was visiting a local bakery on Friday (interview and photos coming soon), I was inspired to use it in a different way.  That different way came about in my kitchen today.  Husband ate them – right out of the oven, before the caramel even had time to set!  They are that good.

Here are two important criteria to remember when baking these: quality contents produce quality baked goods.  The two stars of these mini cups are the salted caramel and the chocolate.  I used a Dutch bittersweet chocolate for some of the chocolate in these cups and then the homemade salted caramel.  Taste matters when baking – not just precision!

Salted Caramel Chocolate Chip Oatmeal Mini Cups
Author: 
Recipe type: Cookie
Cuisine: Dessert
Prep time: 
Cook time: 
Total time: 
Serves: 24
 
Caramel and chocolate - any complaints?
Ingredients
  • 1 cup packed light brown sugar
  • 1 stick unsalted butter, softened
  • 1 egg
  • 1 tsp vanilla extract
  • 1¼ cup all-purpose flour
  • 1 tsp baking soda
  • 1 tsp sea salt
  • ½ cup whole oats
  • 2 oz semi-sweet chocolate chips
  • 3 oz bittersweet chocolate (I used Droste Dutch chocolate)
  • Salted caramel sauce (I use the one on Brown Eyed Baker)
Instructions
  1. Cream butter and sugar. Add egg and vanilla. Cream until smooth. Add dry ingredients then fold in chocolate and oats.
  2. Fill mini baking cups with one scoop - about 24-36 cookies.
  3. Bake at 350 for 12-14 minutes.
  4. When you take them out immediately mash down the top to form a little holder for the caramel.
  5. Add a half teaspoon to the top. It will melt and then harden up as cookie cools.
  6. Enjoy with a tall glass of milk and a good book. Share if possible.